
ESP-01 modules from Ai-Thinker seem to be the cheapest option when it comes to microcontrollers with Wi-Fi connectivity. NodeMCU offers a reasonably high-level programming toolkit for these modules which is suitable for simple projects (like a sensor network).
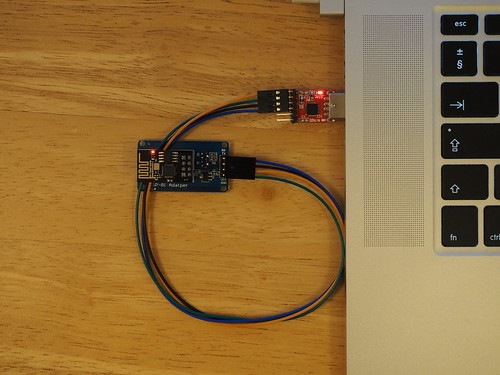
Any USB-UART bridge like CP2102 can be used to connect ESP-01 to a computer USB port for programming. On macOS extra drivers from Silicon Labs will be needed.
UART breakout boards for ESP-01 are very handy when attaching the board to the UART bridge header via a 4-pin cable. As usual, TX pin on the bridge should connect to RX pin on the board, and vice versa.
AT commands test
AT commands may be used out of the box with a newly bought ESP-01 module. If using minicom serial terminal, one should «send» commands to the module with C-j (a simple Enter key won’t work).
Flash NodeMCU
To build NodeMCU firmware, I used marcelstoer/nodemcu-build Docker image that contains the toolchain:
git clone https://github.com/nodemcu/nodemcu-firmware.git
cd nodemcu-firmware
docker run --rm -ti -v `pwd`:/opt/nodemcu-firmware marcelstoer/nodemcu-build build
This left me with a nodemcu_float_master_*.bin file that needs to get onto the board. Time to flash NodeMCU and get hacking! I used esptool and nodemcu-uploader:
pip install esptool nodemcu-uploaderGPIO0 pin must be pulled down prior to powering the board to enter the flashing mode (I used a pin to short GND and GPIO0). Now the command to run is:
esptool.py --port /dev/tty.SLAB_USBtoUART write_flash -fm qio 0x00000 bin/nodemcu_float_master_20180210-1805.binThis has to be done only once (unless you change the firmware and/or its config).
Use Lua to program ESP-01
Now *.lua files for your project using NodeMCU can be uploaded to the board via
nodemcu-uploader --port /dev/tty.SLAB_USBtoUART upload *.lua